
This tutorial is the conclusion of many experiments I went through with this
special form a spoon has.
I'll do my best to go into detail, because here there are many things to be
aware of. So here we go
Step 1: Draw this curve using  Control
Points tool, and then edit with this
Control
Points tool, and then edit with this  tool.
tool.

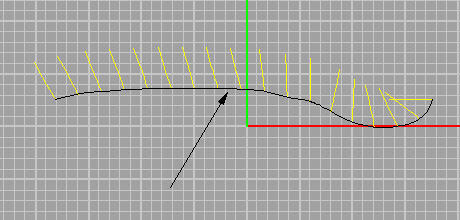
Step 2: Click & hold MB for the Arc submenu to pop up, then select
this one  and go as follows:
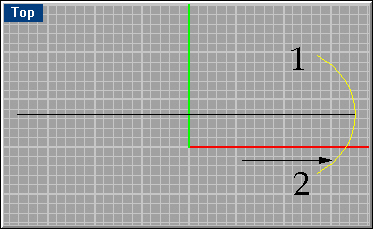
Holding the Shift key, determine the distance from the curve (1) and move
the pointer to the other end (2). Clicking the MB ends the action and you
must carefully move the pointer until you're satisfied with the angel (arrow
direction).
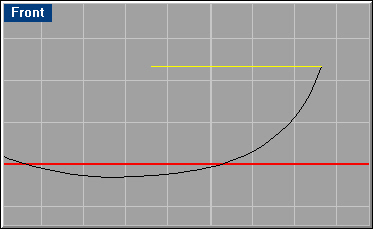
Step 3:Now go back to the front view, use the  magnifying tool at the top menu and place the arc precisely at location shown.
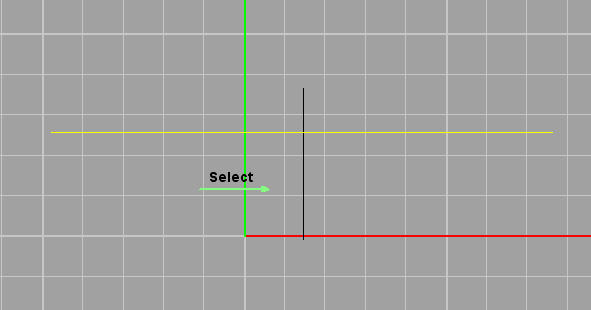
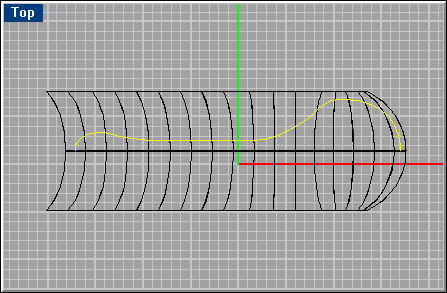
Step 4:Use any of these 3 buttons  to regulate
the 4 views (RMB is also important), switch to the right viewport and do this:
to regulate
the 4 views (RMB is also important), switch to the right viewport and do this:
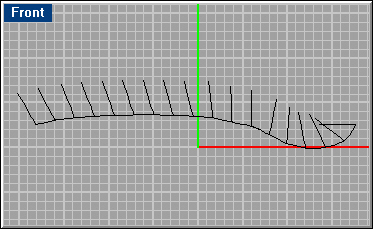
While the arc is selected, activate Transform/Array/Along Curve, point to
the curve created earlier and for the number of ticks type in 18. If everything's
well, you should see this in the front viewport. In the next step you'll see
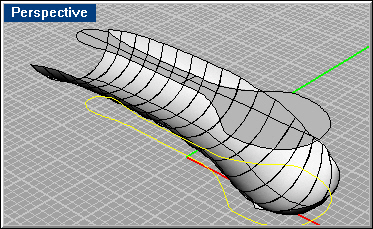
how this set of curves transforms into the spoon surface. Now in the front view select the surface from the previous step, click the
Split tool, then the extruded solid, and press Enter. This is what you should
have.
Step 5: Now click on the
Step 6: Now go Surface/Loft and you're done with this part.

Step 7: Now, at the top view, start to create the top shape curve of
the spoon (with the Control Points tool, naturally).
A few important points: 1. You must start & end the curve where the mid line
is. This is because you're going to mirror it.
2. Since you're going to split one surface from another, this surface must
be smaller than the other. 3. Always check accuracy with the magnifying tools.
It helps a lot. Now edit the curve until you're satisfied and then check for
accurate junction points at both ends. Then mirror and join both curves. When
mirroring it's bets to hold the Shift key.
If it happens that Rhino says 'unable to join curves' - this is the time to
go check junction points.
Step 8: Now that you've joined both curves, go Surface/From Planar
Curves and turn it into a solid.
In this example you can see both the curve used to make the surface and the
solid as result.
Now for the final part - split & enjoy!
Step 9: Select the surface you just made and go Solid/Extrude Surface.
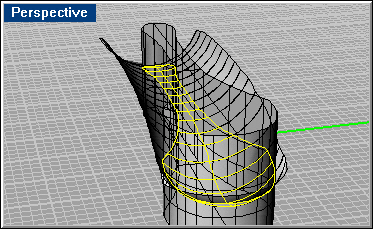
Here you can see all 3 surfaces/solids: The vertical is the extruded surface,
the horizontal is the initial surface you made earlier, and the one in yellow
is the final spoon.
Final step: Click
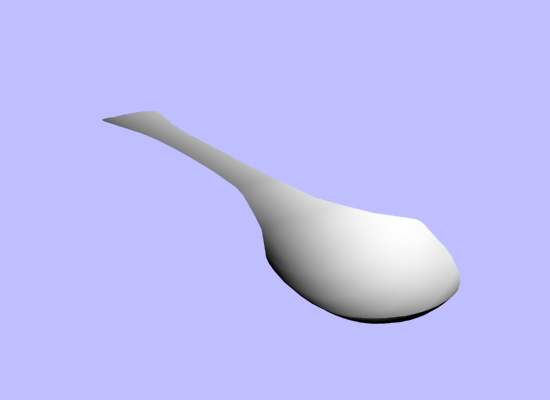
True, this isn't the ultimate spoon, but it's in my view a good way to create it. One can play with the various curves and improve the model. In any event I'm proud to be able to hand this small contribution.
(: Have fun :)