
In this tutorial I'll show you a simple way to create whatever cog you wish and with any number of pieces.
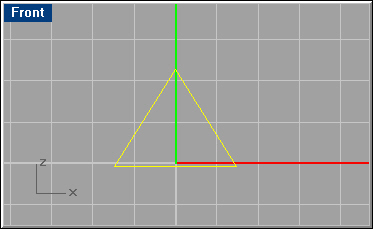
STEP 1: The 1st thing you do is select this ![]() icon and build a triangle. Then use the Control Points tool
icon and build a triangle. Then use the Control Points tool ![]() to adjust the points for a decent triangle. Having created this triangle, activate the Surface menu and select From Planar Curves. Then in the top view copy that surface.
to adjust the points for a decent triangle. Having created this triangle, activate the Surface menu and select From Planar Curves. Then in the top view copy that surface.
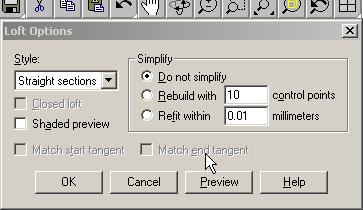
After you press enter, Rhino will present this interactive box, where you should select the 'Straight sections' option.
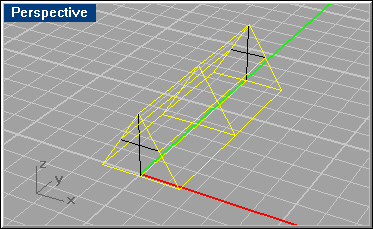
Having selected that and pressing Enter you will have this object or solid.
STEP 3: Before continuing, go to the right view, select the
 rotation tool; place the mouse at the center of the object and click once. Rhino
will ask for the amount of degrees, type in 90. The object will rotate by 90°
in all views.
rotation tool; place the mouse at the center of the object and click once. Rhino
will ask for the amount of degrees, type in 90. The object will rotate by 90°
in all views.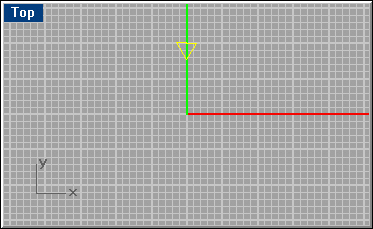
In the top view you should have this.
STEP 4: If all OK, go to the left toolbar and select the solids submenu:
 and choose the 2nd from below - the tube. Try your best to arrive at the result shown here.
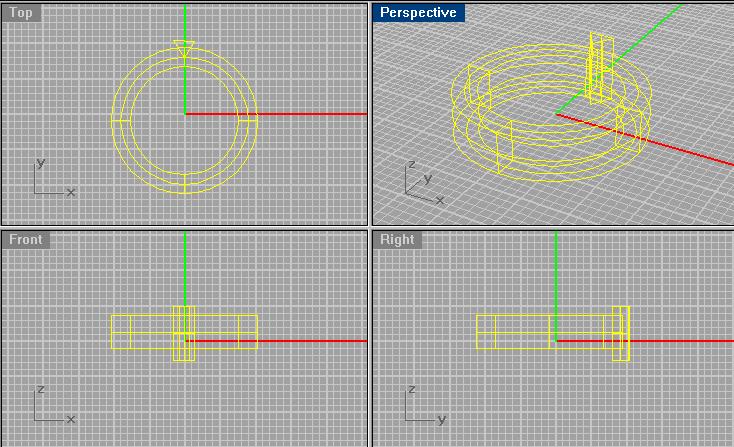
STEP 4: Now for the interesting part: Duplicating the teeth and cutting them out.
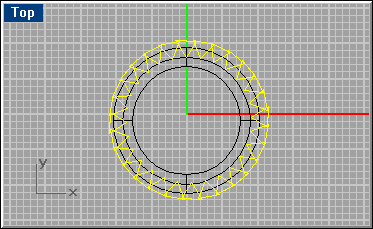
The 1st thing to do is to multiply the teeth; at the top view, select the triangle , the from the Transform menu select Array/Polar. Rhino will ask for the center so click there, then for the number of pieces type in any number you like, like 36, see what comes up, and use the Undo tool to go back & change things. In the example I used 28.
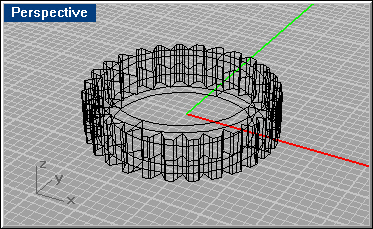
STEP 5: After you have this it's time to cut these out. A word of cardinal importance: If you don't work with Rhino 2.0 you're in for trouble, because 2.0 has the group command, making life easy. Otherwise you must select all 28 pieces individually. Suppose you have 2.0, do select all, then hold the Shift key and click on the tube. This will leave only the 28 pieces selected. Group them, and you're done. Now select the tube, click on the Boolean menu to get the submenu, then select the 2nd one, Difference. Click on the grouped teeth and press enter. You have it!
STEP 6: Now click on the blue Render button, and enjoy.
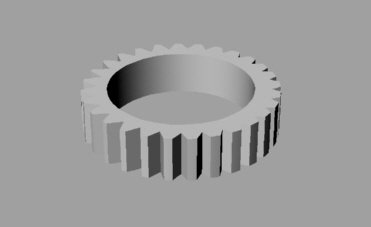
Have fun, I do